How To Install Lightroom Brushes in 2024?
Adobe Lightroom is handy software for professional photographers in this digital photography world. With new updates of 2024, it’s mandatory to understand the method of lightroom brush installation methods.
This guide will help you to understand How To Install Lightroom Brushes in 2024.
Step-by-step guide on How To Install Lightroom Brushes in 2024?
Step 1: Open Adobe Lightroom Mod APK and find the preferences, where you’ll find the Edit dropdown menu by using the keyboard shortcut “Ctrl + (comma).”
On PC: Using Lightroom, click on “edit” at the top and then click on “preferences.”
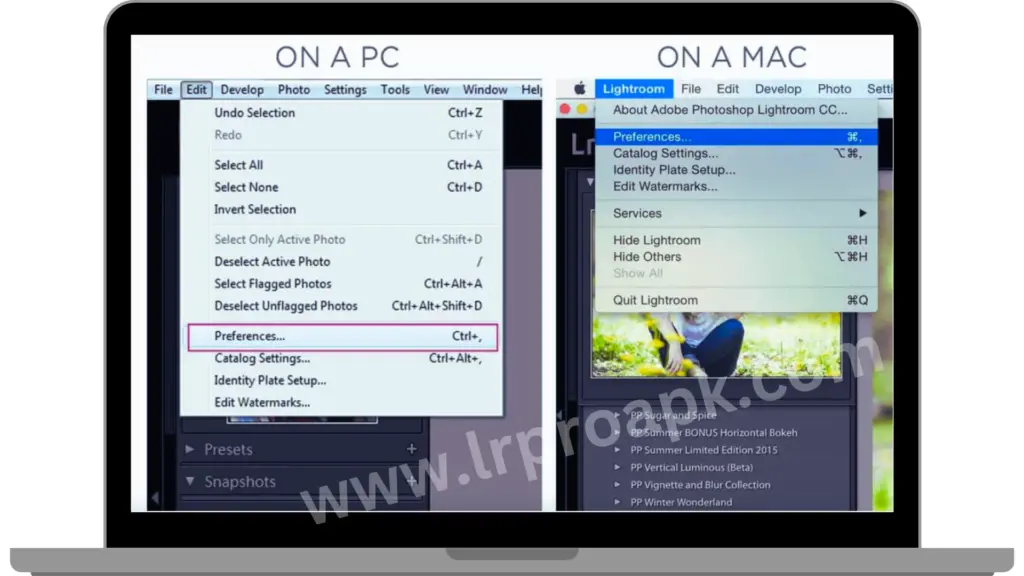
On MAC: Using Lightroom, click on “Lightroom” at the top bar and then click on “Preferences.”
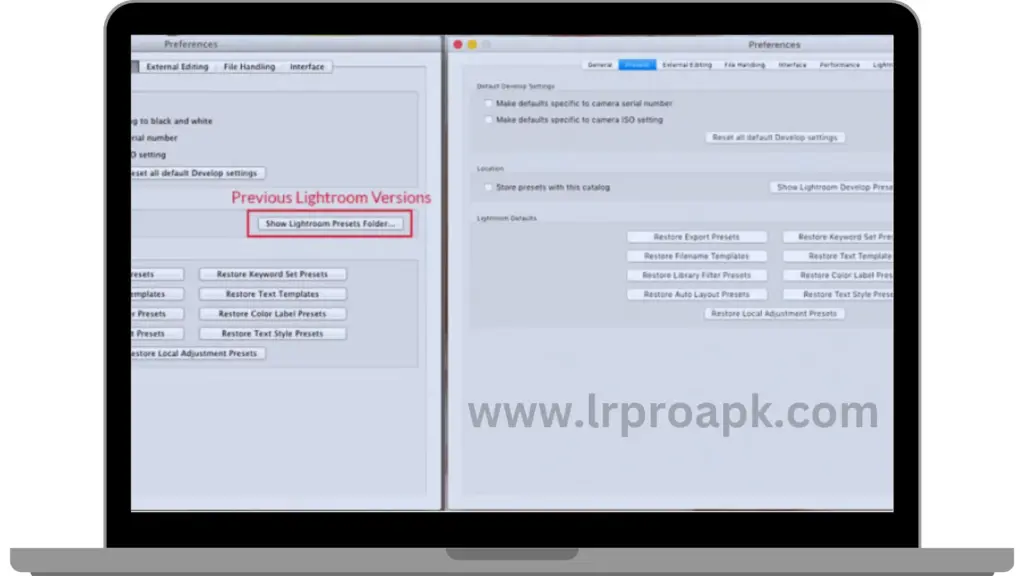
Step 2: Now click on the preset option from the preferences box and then click on the button that shows “Show All Other Lightroom Presets.”
Step 3: Here, you need to click on the “Show all other Lightroom Presets button.” If you have an older version of Lightroom, then click on “Show Lightroom Presets Folder.”
Step 4: Double-click on the “Lightroom” folder.
Step 5: After that, double-click on the “Local Adjustment Presets” folder.
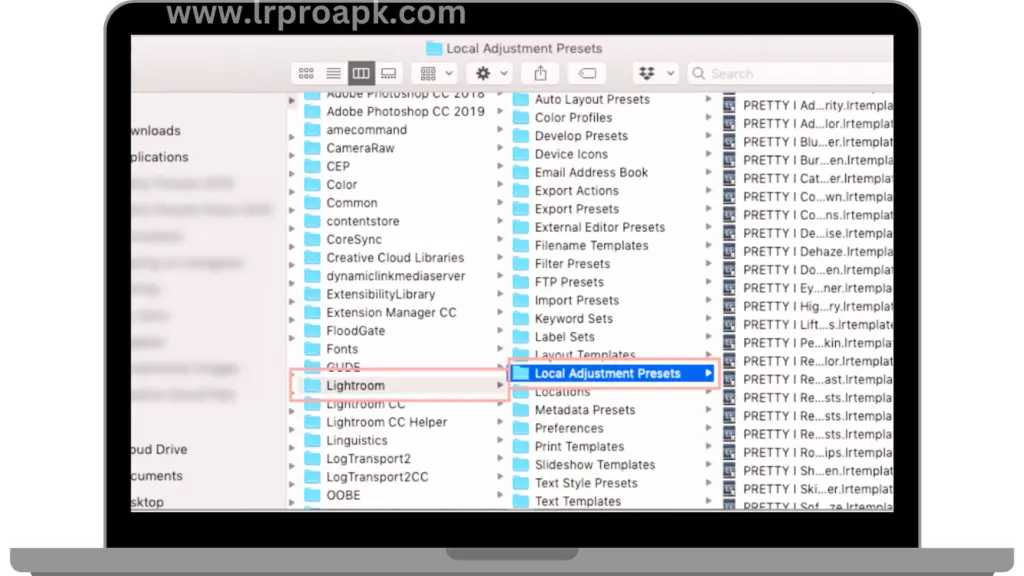
Step 6: Now copy all brushes and paste them into your computer’s “local adjustment presets” folder and download them on your PC.
Step 7: Now, all your brushes are downloaded. Restart your, and your brushes will be ready to use.
How To Find Brush Presets In Lightroom?

You can use brush presets only on the LR Classic because the Lightroom mobile desktop version doesn’t have the facility of using a brush preset yet. To find your brush presets, follow the steps below.
Note: It’s only for “LIGHTROOM CLASSIC (VERSION 11+)”.
- Step 1: Click on the dots circle which shows at the far of the tools panel.
- Step 2: Then click on this tool and select “Brush” from the menu.
- Step 3: Now click on the word next to “Presets” to find all your installed brushes.
Note: It’s only for “LIGHTROOM CLASSIC (VERSIONS 4-10)”
- Step 1: Click on the brush tool and then click on the words “and double arrow,” which shows next to the word “Effect’.
- Step 2: Here, you’ll see a list of the brushes which you installed will pop up and now you can choose the one you want.
Lightroom Brush Troubleshooting Guide
Issues while downloading Brushes can be solved with these 3 easy methods:
- Method 1: If you face any downloading issues, try a different internet browser.
- Method 2: After completing the download process, do not directly “open” it; click save and then close. After that, open your device window and find the zip file which will save in the download folder and extract the file.
- Method 3: If you face any problem while unzipping the file, click on the downloaded zip file and “extract” it. Later, you need to download an external program to unzip.
How To Solve The Mystery of Brushes Not Showing Up In Lightroom?
- Just shut down the Lightroom and restart the program again.
- Re-check that you have copied the contents of the folder that was downloaded into the “Local Adjustments” folder and not the “Develop” folder.
- Confirmed what you copied into the “Local Adjustments” folder? Is there any unnecessary thing copied or not?
- Make sure that you extract the “zip file.” If it’s not done, double-click on it and extract it.
This article helps you install Lightroom brushes for your PC and MAC. I hope you learned How To Install Lightroom Brushes. If you still face any problems, feel free to contact me through the comment section.